

Last week, I was in Vietnam. There, I met a guy who showed me a lot of cool things that can be done with AI, how it’s evolving, and how it can improve our productivity.

But let me talk about Excel today.
These days, you will find lots of people talking about using AI in Excel, which is a valid and good discussion. The reason I say that is because everything has been impacted by AI in the last few years.
Now, the question is how to start and where to start. In this tutorial, I’ll help you get started with AI in Excel.
But here’s one thing I want to share with you: I am not a fan of just one tool, and that’s why I won’t be asking you to use a specific AI tool.
Instead, my whole idea here is to inspire you to start using AI more broadly instead of sticking to a specific tool.
The curious case of 10:10
Before we start using AI, I’ll share an example to help you understand its limitations. I am not doing this to discourage you but rather to empower you as a human being.
So do this for me, please.
Go to Google and search for “Analog Wristwatch”.
Then go to the Images section.

If you notice all the watches listed, you will find that each of these images shows the same time — 10:10.
From here, if you go to any of the AI tools (for example, Copilot) and ask for an image of an analog wristwatch, you will get an image with the time 10:10.

The same thing happens when you specifically ask for an image of an analog wristwatch with the time 12:30.

The reason for this is that most of the images on the internet have the same time (10:10), and that’s the data that has been used to train AI tools. And when you ask for an image, it gives you the most common perception of what an analog wristwatch looks like.
And why all the images on the internet have the same time is also an interesting thing (for marketing purposes). You can watch an entire presentation on this, which I did for the London Excel Meetup Group.
But as I said, my point here is to show you that humans will always have an upper hand over AI. So, you don’t need to worry about AI, but rather, you need to use it like a BOSS.
So now let’s see how we can use AI like a boss.
Add formula columns with Copilot in Excel
If you want to start with Copilot in Excel, the best thing to begin with is by adding formula columns. In the below example, I have two datasets: one is the sales data and the second is employee data.

Once you sign up for Copilot, it will show up on your Home tab.
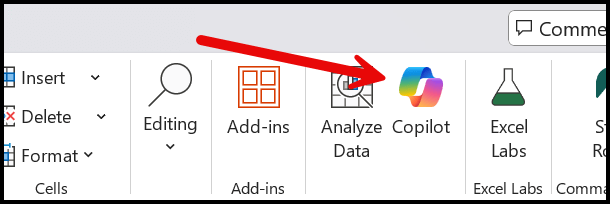
All I need to do is select any of the cells from the data and click on the Copilot button to activate it. The moment you do this; a new pane appears on the right side of the Excel window.
Make sure when you are using Copilot that you have your workbook in OneDrive and AutoSave turned ON.
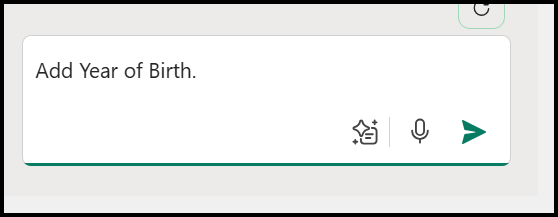
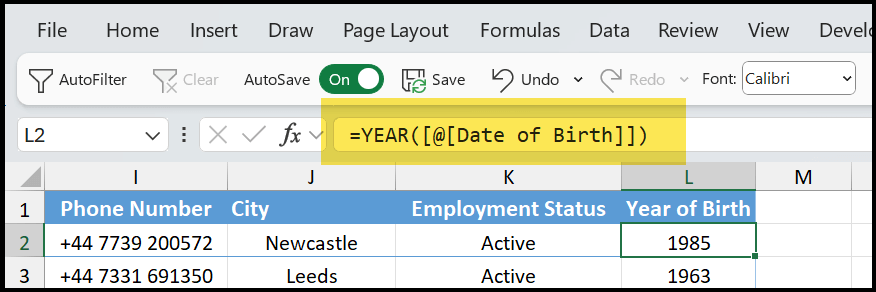
Now in the employee data, I have a Date of Birth column, and we need to extract the year of birth from it. This is simple — type “Add Year of Birth” and hit enter to get a new column.
The moment I hit enter, it takes a few seconds and then returns with a button that I can click to insert a new column with the year of birth at the end of the data.
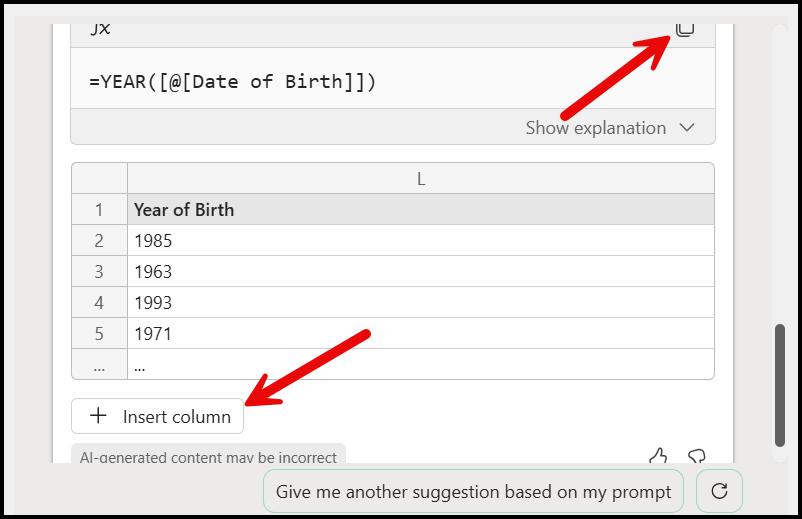
This gives me two options: one is to add a new column and the second is to copy a formula and then add a new column with that formula manually.
In the same way, I need to add a column for the year of joining. I have a column with the join year and I can add a new column by extracting the year from it.
My prompt would be “Add Year of Joining”.

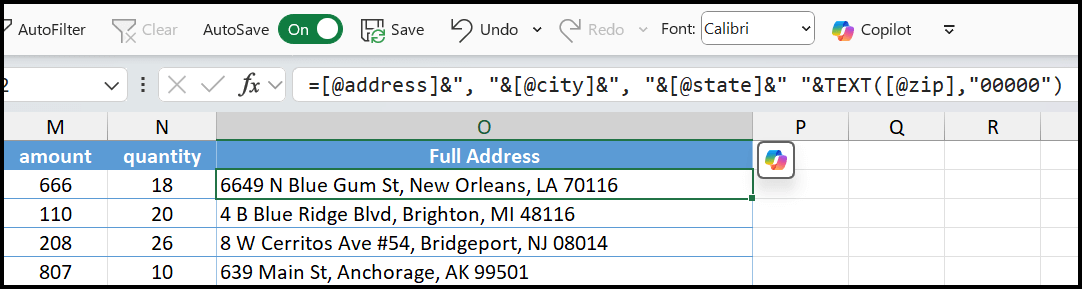
Moving ahead, in the Sales data I have 6 columns with different pieces of information that can be used as an address, and I need to combine all these values into a single column to form a full address. So, my prompt would be “Create a Full Address Column”.

Within seconds, I have a new column with a complete address. And here’s one thing you might have noticed: In my prompt, I haven’t mentioned which columns to combine for the full address.
Using DeepSeek to generate VBA code
If you want to generate VBA code, you can use any AI chat tool. But in this example, I will be using DeepSeek. This is a new tool that has recently gotten attention in the AI space.
As you can see from the below example, I have a list of names in my workbook. Now I want to create some VBA code that can insert new worksheets using these names.

I will go to https://chat.deepseek.com and enter my prompt, “Write a VBA code to insert new worksheets based on the names in column A.”
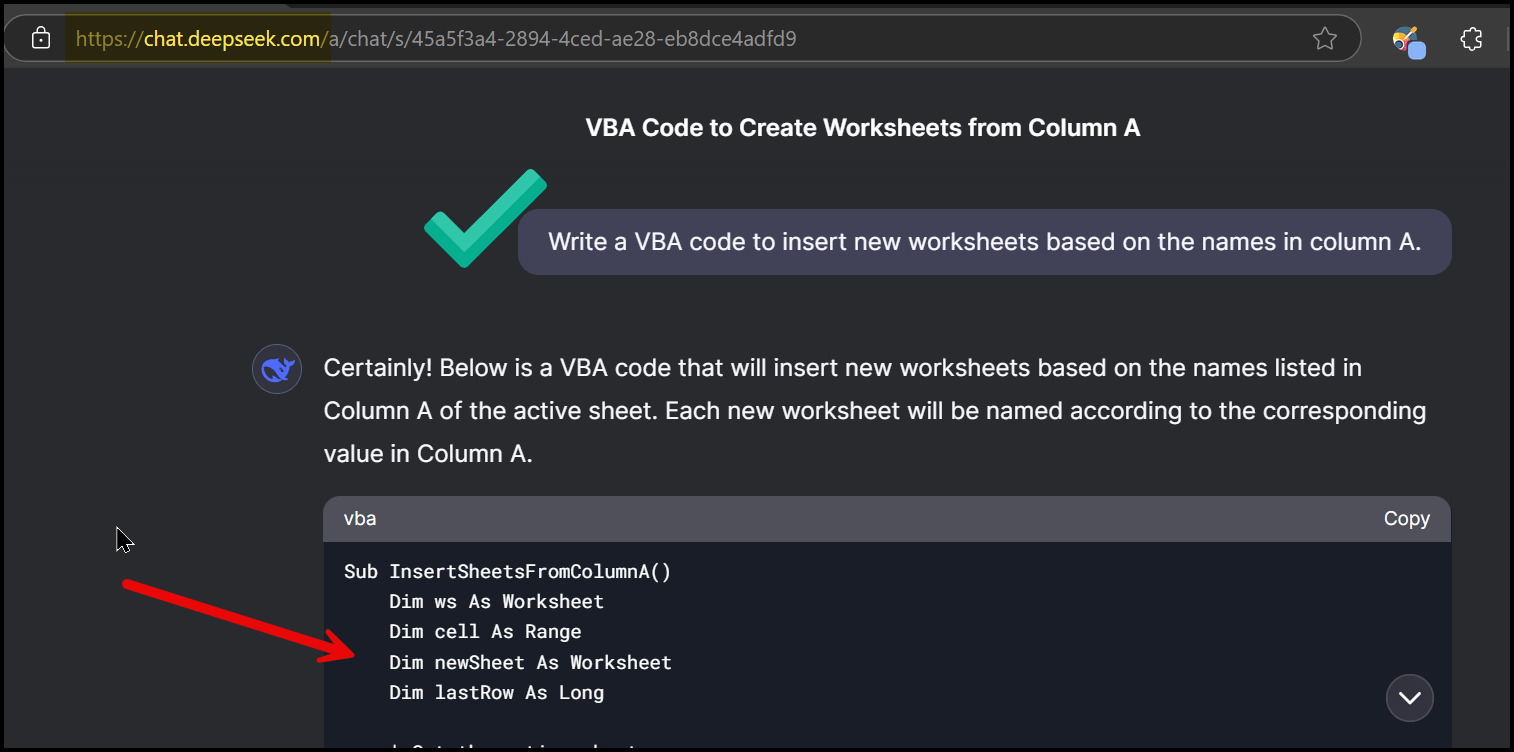
The moment I hit enter, you can see in the above example that I have a response from DeepSeek with the code I was looking for.
Next? You just need to go to Developer > Visual Basic Editor > Insert > Module and then enter your new code in the window.
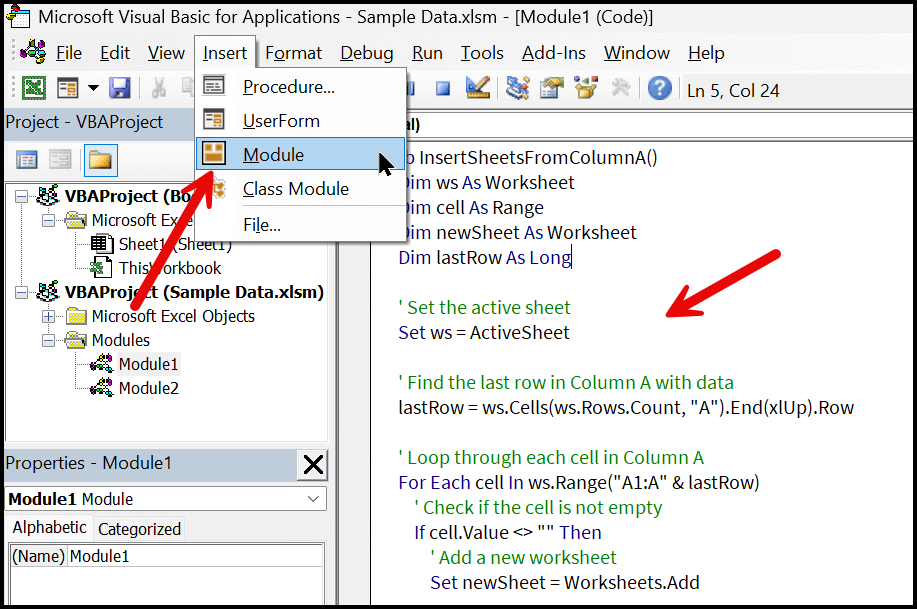
You are running some VBA code. If you have not used VBA before, I suggest you have a backup of your workbook.
When I run this code in my workbook, you can see I have ten new worksheets with the names featured in column A of the main worksheet.

Using AI add-ins in Excel
Not only AI tools — but now you also have Excel add-ins that use AI. Recently, I found one with the name AI-aided Formula Editor.

Once you go to the Developer tab, click on Add-ins and then go to the Store and search for the add-in with the name.

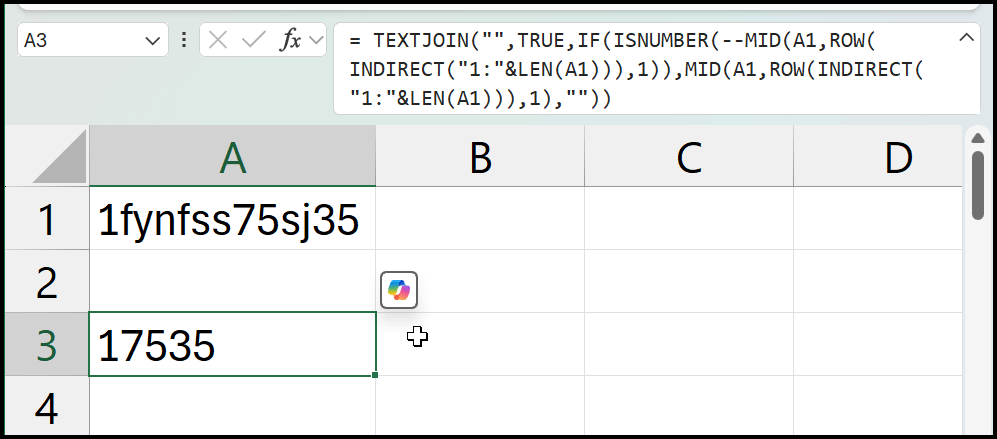
With this add-in, you can generate a formula by using simple prompts or natural explanations. In the example below, I have mixed values in the cell A1. And with the help of the add-in, I have generated a formula to extract only numbers from the cell.

Now, when I use this formula, I get only numbers in cell A1, which are 17535.
You can also see how easy it is to generate a complex formula with the help of this add-in. And once you generate the formula, you only need to select the cell where you want to enter the formula.
AI function in Excel with API
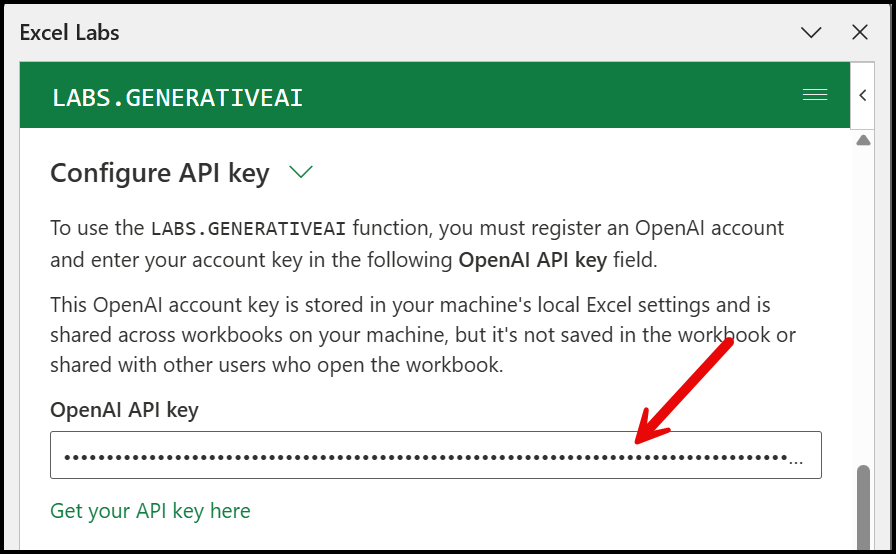
There’s one more add-in that can help you to have your AI function in Excel. Microsoft’s Excel Labs allows you to connect OpenAI’s API to Excel and use the LABS.GENERATIVE AI function.
First things first, it has a cost. But it’s quite cheap if you look at the bigger picture. Let me show you how.
- Go to platform.openai.com.
- Click on the Settings icon at the top right side of the window.
- Click on Billing.
- Click on Add to credit balance.
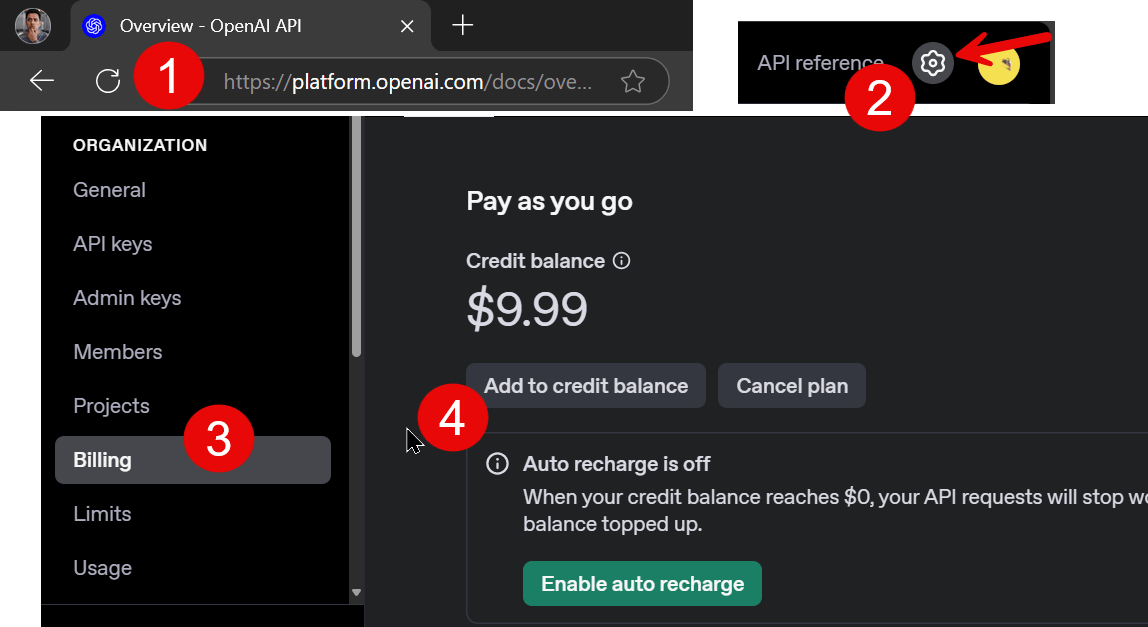
Note: You can start with as little as $5.
After that, you need to generate a new API key that I can use in Excel to get the LABS.GENERATIVEAI function. For this, I’ll click on the API Keys and then Create new secret key.

Once you get the key, click on the Copy button to copy it.
The next thing is to add the Excel Labs add-in. And the steps for this are the same. Go to Developer > Add-ins > Store and search for “Excel Labs”.

When you open the Excel Labs add-in, you get an option to add the API key, and this is the same API key that we have just got from the Open AI’s platform.
At this point, your AI function is ready to use. All you need to do is to go to your worksheet and use it to solve a problem.
How? Let me take you through the same example I have used to solve with the AI add-in.
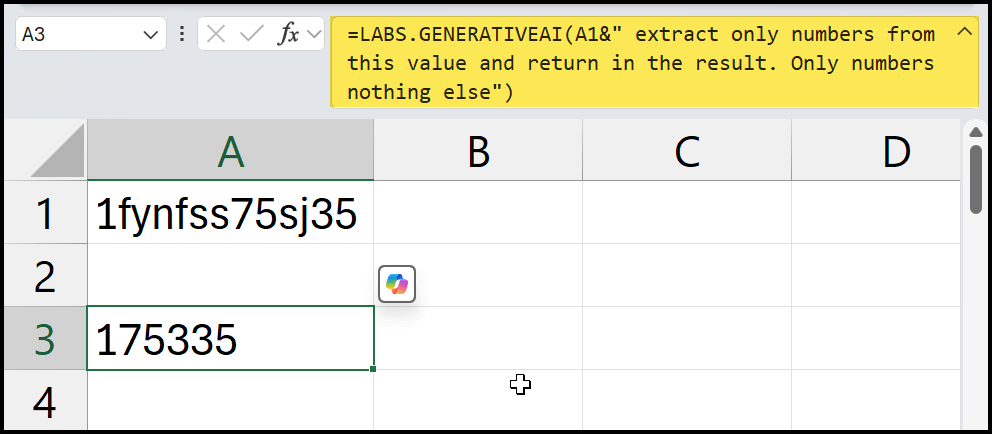
I have used the LABS.GENERATIVEAI function. In the first argument I have referred to cell A1.
Along with that, I have a prompt that says, "Extract only numbers from this value and return in the result. Only numbers, nothing else."
The moment I hit enter to get the result, I got the same number I did with the last method.
In the first argument of the function, you can add your prompt (what you want the function to do).
In my example, I have used the reference to cell A1 where I have the value, and then using an ampersand, I have added that I want to extract the number only, and I want the function to return only the number — nothing else in the result.
Now, I’d like you to play around with all the tools I have shared above. In the conversation section, please do share with me which one you like the most and how you are going to increase your productivity in Excel with these AI tools!
Watch the video

Latest Articles
.png)
Sheetcast - A Natural Evolution for People Who Love Excel
.png)
How to Build Your First AI Agent in Excel
Leap into Excel’s AI revolution with COPILOTALT by Sheetcast
Join the Master Club
Your exclusive all-access pass to our entire digital learning experience for a whole year.
.png)